Ocean Painting Tutorial:
Tutorial One
Hi, and welcome to a technique tutorial on using Paintshop
Pro. This tutorial was
created using Paintshop Pro version 6.02 and the Netscape
4.7 HTML composer.
This HTML page was designed to be viewed in an 640 x480
display environment
for people who need larger text and graphics.
Illustrating the ocean is difficult, this is because it
never sits still long enough for you actually draw or paint, it is always
in motion, and ever changing. This
tutorial deals with just one aspect of the sea, and that
is when you are standing
on the shore with the sun on or near the horizon and
the waves are breaking.
Often, you will almost seem to see through the waves,
they are not quite transparent, and the effect of the sun lightens
areas of the wave making them beautiful to watch. Today, I'm going to show
how to duplicate that effect when you create your own illustrations of
the sea. PSP has a few nifty tools that
speed up this process considerably.
First start off by opening a
new file, make it twice as wide as it is long to give
your final picture a "Snapshot" look. In this case, The
new file was created at 1200 pixels wide by 600 pixels high with a 72 PPI
resolution, and a white background as I wanted to use the image online
only.
Choose your Line drawing tool and in the tool options
section, choose Bezier
Curved, and Stroked lines, give it a width of four pixels,
and check the "Anti-alias"
box. The first lines we are going to draw are the rough
shapes of the waves, I set
the foreground color to grey so the lines would be grey.
Overlap the bezier lines
like this:

Next you are going to fill in the main ocean colors...
You can start by choosing a
medium or dark green... select the areas you want to
fill with the magic wand,
holding down the shift key to select multiple areas.
Next select your fill tool, another words the paint bucket on the left
side menu... right click for the tools option menu. On the tool options
menu for your fill tool, choose Solid color, and Darken, from the drop
down menus and set your Opacity to 100%. Click anywhere in the selected
area to fill... your pic should look like this now:

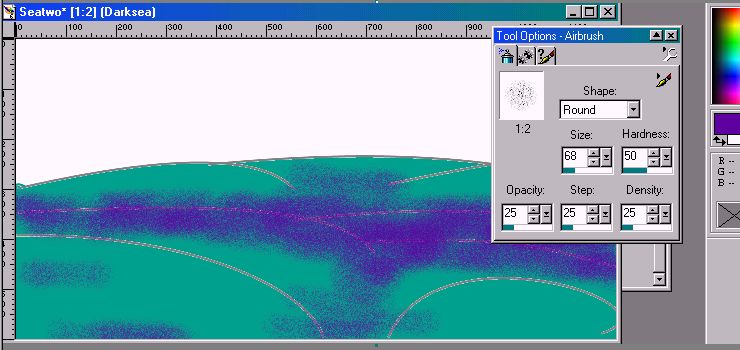
Next your are going to put in the the deep
water, and the areas where the water
sections are dense... Choose Layer: New Raster Layer
to create another working
layer so you don't mess up the seagreen layer. By creating
another area to work
on in the illustration you can mess up and you won't
lose all your work. On the
new layer, choose the airbrush tool, (The Spray Paint
can on the left side menu)
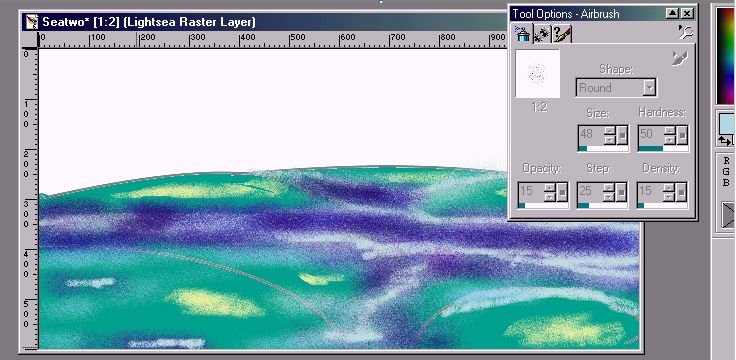
set your foreground color to black, deep navy blue, or
a dark purple. In the
tool:option menu set the Opacity, and Step of the airbrush
to 25% each (25).
Then paint in the deepwater areas by repeatedly airbrushing
segments of canvas
where the deep waters will be.... You can experiment
around a bit, and try
different colors out, to see how the image will turn
out different...
When you are done merge the layers together using
Layer:Merge, and choose the
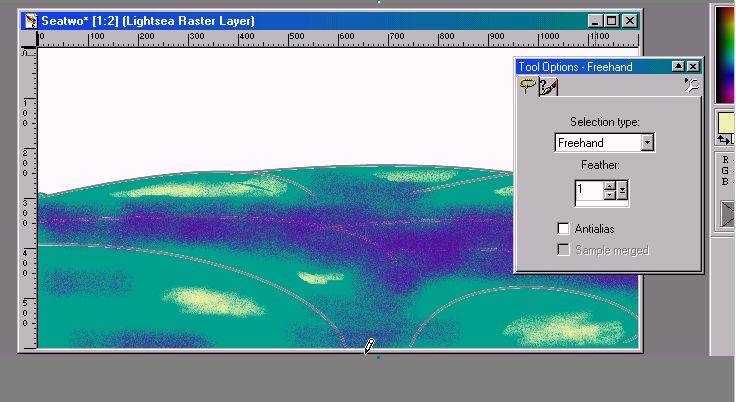
merge visible option... Now are you ready to put in highlights?
Good! Create a
new raster layer. Choose the lasso off your menu and
lasso areas of your picture where the sun will shine through, or where
the water will be shallow and more translucent... Pick a light lemon
yellow foreground color and then choose your airbrush tool. Keeping the
Opacity and Step size the same, reduce the size of
the brush and paint in the brighter areas. When you are
satisfied, merge
your layers together and your illustration should look
now look like this
Now it's time to add the foam and whitecaps... ready?
Choose a very light blue or grey foreground color.
Keeping your airbrush tool on
a tight leash, with a small brush diameter. In the airbrush
tool:option menu you can increase the Opacity and Step to 50 % or even
more for the first few strokes... All
you want to do is airbrush in the lines you drew first
resembling the shapes of the
waves, then increase the diameter of the brush, and decrease
the Step and Opacity
to less than 20%, go over the lines you just drew again,
and further wherever you
want to put spray or your wave crest, run the airbrush
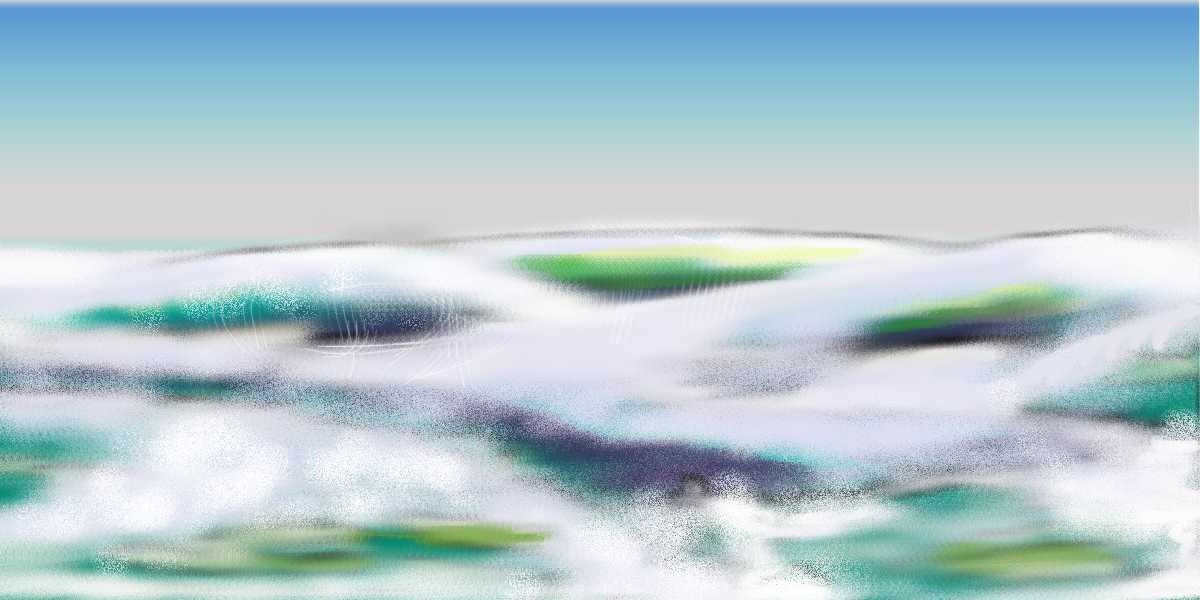
over these areas. When you are done, you'll be doing real good if your
illustration looks like this:
Ok... Now for just a couple more steps and you
will be all set. You want to blur
the image to blend the pixels together some. Choose Image:Blur
from the menu....
Maybe once more just to get the picture good and blurry...
Then you are going to
take one more major step, after that it's all touch up.
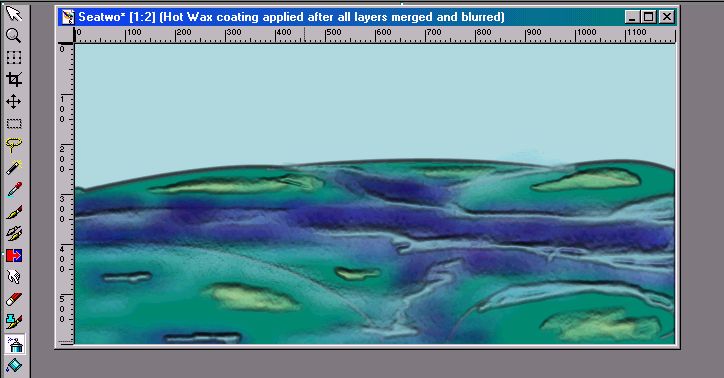
You are going to apply a
hot wax coat to your illustration. Here's how. On the
top file menu, choose
Image:Filter Browser and choose Hot Wax Coating. Wow!
Now we are getting
close... Go ahead, experiment with all the filters to
see what they can do for you...
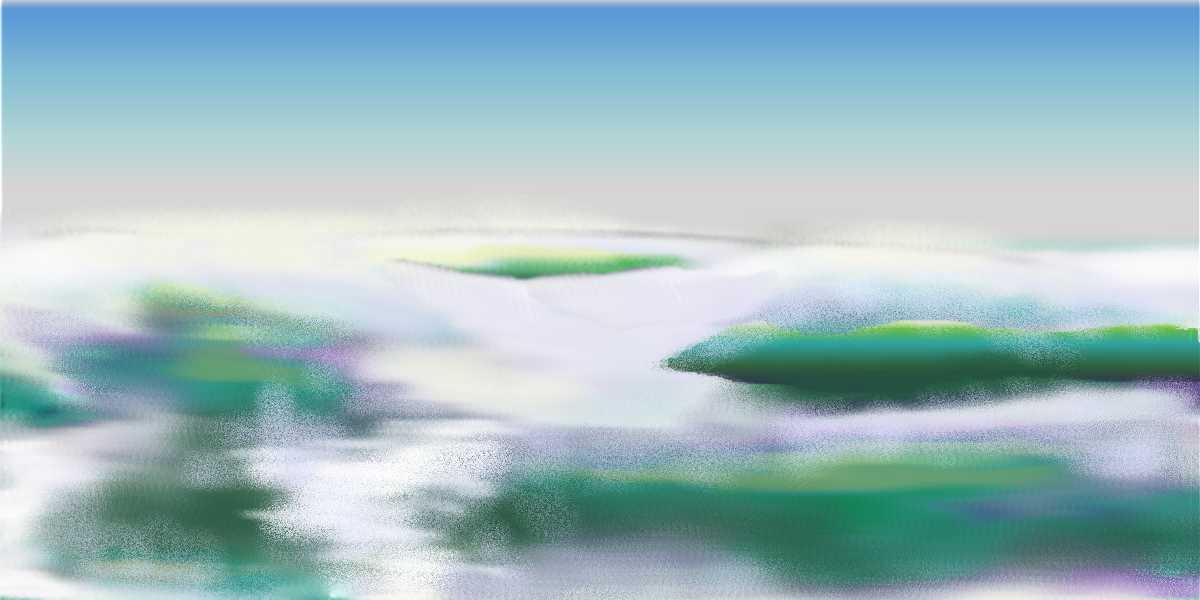
This is starting to look like a real ocean... From here,
we go to final touchups...
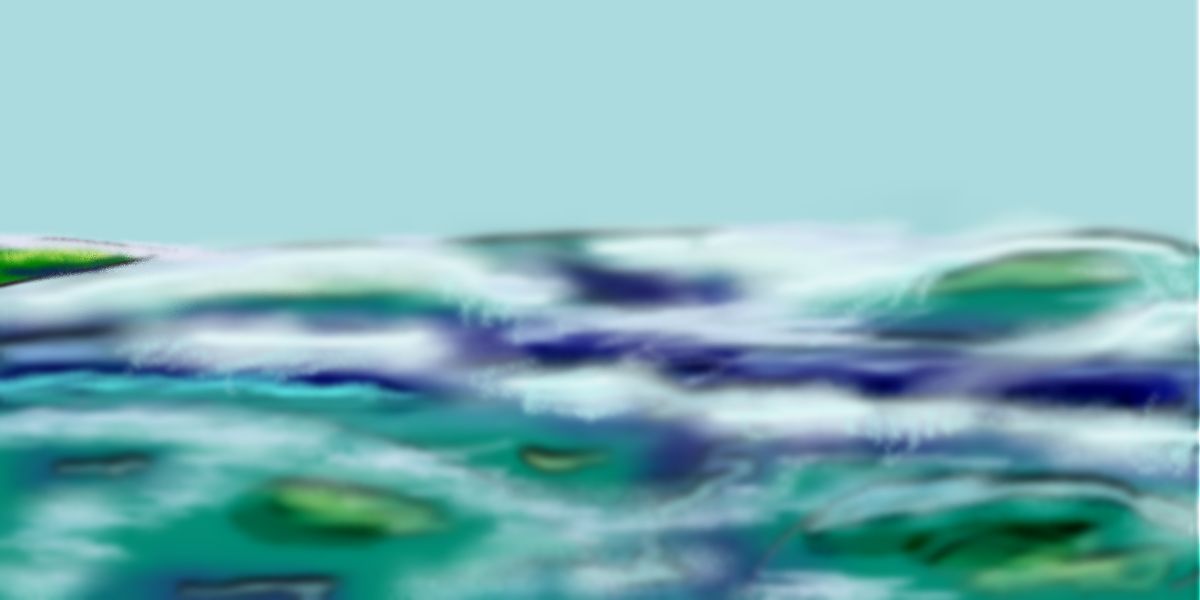
Choose Image:Blur once or twice more to get rid
of the grainy effect of the hot wax coating and choose your Airbrush to
finish the job. You want to pick a bright off-white color as you are going
to now add in the wave crest and selected areas will have sea spray as
well. With your air brush diameter small, and your airbrush Opacity set
to 50 or 75 % and your airbrush Density set to 75% paint the white foam
crest of the wave right underneath the sea horizon line, paint in any other
areas where the foam is so thick as to obscure the ocean at this time as
well. Now set the Airbrush Opacity and Density to 25 % keeping the brush
small add sea spray in selected areas around the foam and crest where the
sea is especially violent. If anything looks odd in the illustration use
the Touchup tool on the left side of your menu (The little hand symbol...)
The touchup tool allows you quite a variety of blending options to experiment
with, and with your eyes, you can any fix any obvious inconsistencies
in the illustration. Play around, experiment a bit. With just a bit of
practice you too, can be creating realistic seascapes in ten minutes or
less... Here is what the final illustration looked like after adding the
wave crests, touching up the sea spray, and blurring the image one last
time.
Here is another one I like a bit better... From the same base illustration.
It may take a bit of practice to get the effect you want.
Thanks for your time today. You can look forward
to seeing other tutorials on
oceans painting before too long featuring the varied
effects of ocean temperature,
sunlight, glow and reflections, along with another tutorial
on how to paint nearly
transparent water flowing over rocks... Great for rocky
seashores and high mountain streams...
Bibliography:
Robinson, E. John. The Seascape Painters Problem Book
New YorkWatson Guptil Publications, 1976.
Jasc Software. Jasc Paint Shop Pro Version 6.0 User's
Guide
Jasc Software, Inc. 1999.
Copyright 2001, All rights reserved. Dirk T. Collins res04tzu@gte.net